For quick access to a teacher’s timetable, register, seating plans, recording group behaviour, markbooks and groups data, you should link your account to the teacher you’re covering. To do this you click on your login name then settings, then find the teacher’s name in the ‘Link your account to a teacher’ section.
Click on the teacher’s name, then click on ‘Choose teacher’.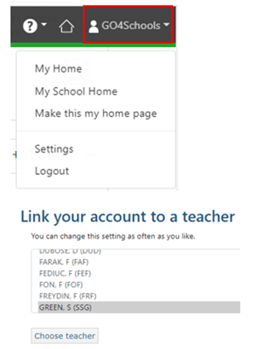
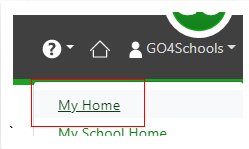
Alternatively, if you want to temporarily access another teacher’s timetable, register, seating plans, recording group behaviour, markbooks and group data, you can click on the Teacher, then teachers link on the menu.
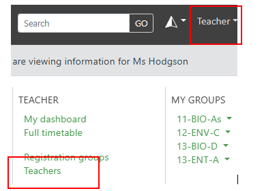
You can then click on the name of the teacher you want to cover or view their timetable or homework using the clock and house icons.
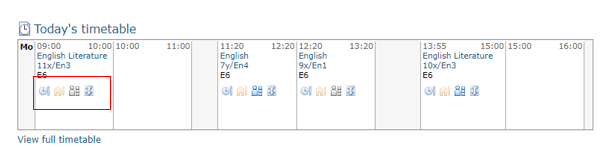
The timetable page will provide you with the following links for every class or registration group, identified as icons on the teacher’s timetable.
- Record group behaviour events selected by the school.

- Take the register for the class/Class attendance.

- View the seating plan for the class.

- Set homework for the class.

Taking a form group register:
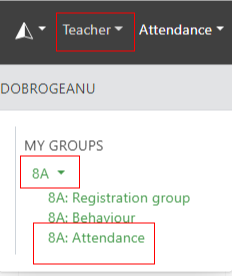
To take the register for a registration/form group, select Teacher on the menu bar, select the group then select attendance.
To complete your attendance register, click on class attendance for any class on the teacher’s timetable.
You can also access the class register from the class markbook. To access the register, click the ‘group attendance’ link from the menu at the top of the markbook.
Once you have clicked on the class attendance icon, you will see the screen showing the students in your class.
You can now complete the class register for the date shown and for all students in the class. The active lesson period will be highlighted in yellow.

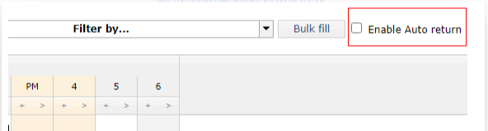
GO 4 Schools can also automatically move down to the next student once you have entered an attendance code. This feature can be enabled by selecting/ticking the ‘Enable Auto return’ checkbox.
You can now complete your register using the keyboard keys to enter the correct codes, or by using the code selector in GO 4 Schools when you click inside a box.
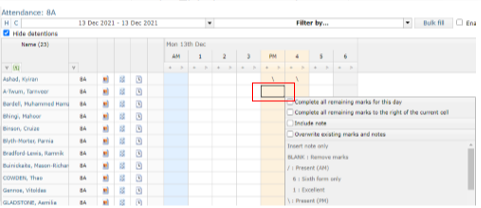
You can also add notes to a student’s record, such as the length of time late and a reason, by clicking on the arrow and then typing the notes into the note box.
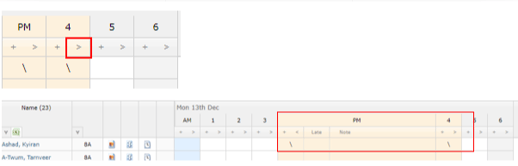
When a note or minutes late are added, a red flag appears in the top right-hand corner of the student’s mark box. Once all attendance marks and notes have been added, click the save button at the bottom of the screen to save your register.

To return to the teacher’s timetable you’re covering.
Viewing a class seating plan:
Then click on the seating plan icon for the class you want to view
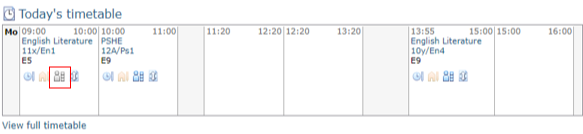
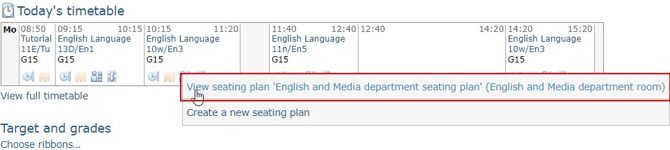
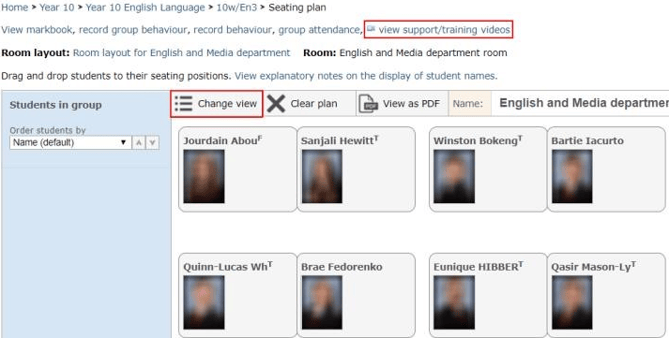
You will then see two options, select ‘View seating plan’ to see the teacher’s seating plan or select ‘Create a new seating plan’ to create your own version.
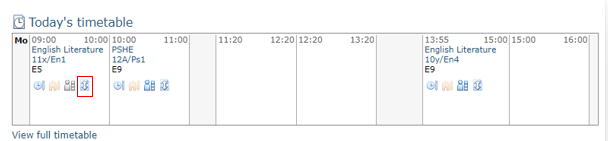
Return to the teacher’s timetable, then left click on the record group behaviour icon for the class.
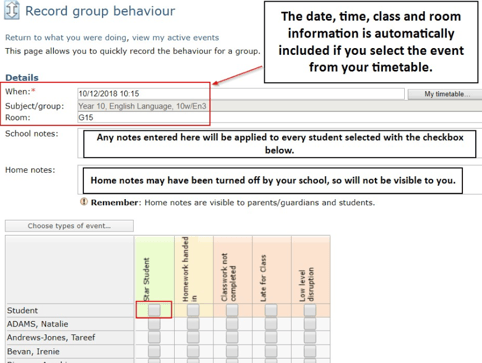
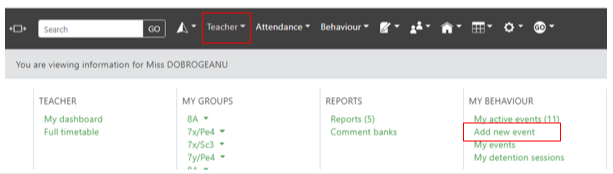
Single behaviour events can be recorded by clicking on the ‘Teacher’ on the menu bar.
You can also find the ‘record behaviour’ link from a markbook, subject/group or student page.
Select the type of behaviour event you want to record from the drop-down menu. Certain immediate and follow up actions may also appear when you select the type of behaviour.
These may be immediate actions that you need to follow during the lesson.
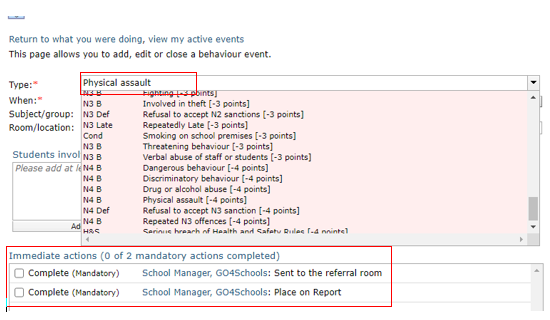
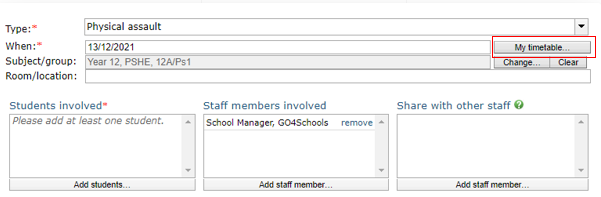
Click on the ‘My timetable’ button and select the group the student(s) are in from your timetable. This will then automatically complete the date, time, class code and room.
If you are recording a corridor/lunchtime event not linked to a timetabled lesson, you can type in the location before selecting the type of behaviour and student(s) involved.
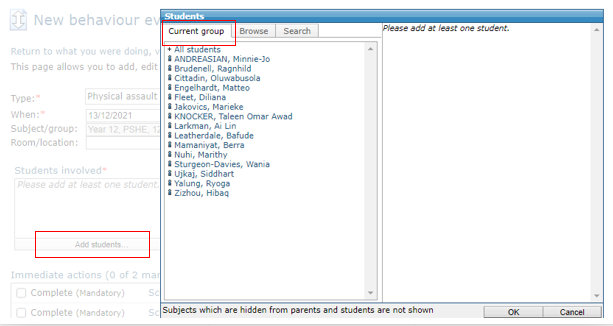
Click ‘Add students’ and then click the names of the students from the menu list that is displayed. If you have selected a group from your timetable, the class list will display automatically. You can also browse year groups or search for a student by name, using the tabs at the top of the menu list.
Once you have selected all the students involved, click ‘Ok’.
You can also choose to add other members of staff if they were present, to avoid duplicate logging, or notify members of staff by sharing the event.
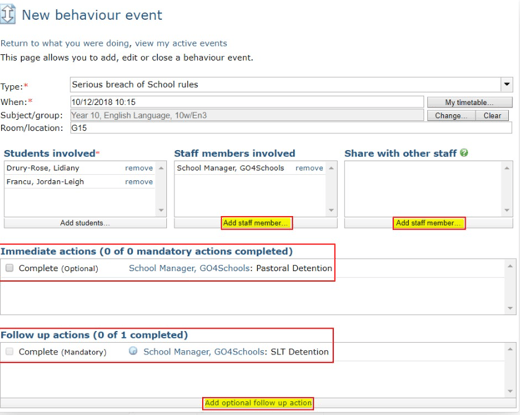
Mandatory immediate actions will need to be marked as complete before you will be able to save the event.
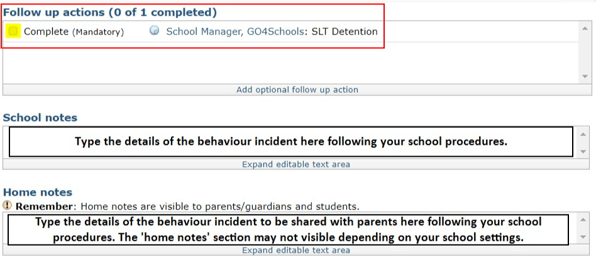
You can edit the event again later to mark any ‘follow up actions’ as complete or select additional ‘optional’ follow up actions.
Now type the details of the incident in the school and/or
home notes section following your school’s guidance.
You can then save the event and the incident will be recorded and logged on the student’s record in GO 4 Schools.