If after your subjects have been locked a change needs to be made to your subject/groups/group membership, you could make this change in your MIS as normal and unlock the subject to pull the change through overnight. However, if you have already started to make timetable changes in your MIS this may not be a safe or viable option. This is where our Subject and group management tool comes in handy to make alteration without the need for an MIS feed to process. The tool is designed for use in exceptional circumstances such as this, and not as a way to manage your subjects and groups all year round. The fact that changes take effect immediately makes this tempting, however it could create more work for you in the long run as all changes to group membership and teachers would then need to be made manually in the tool. Also, if you were to unlock a subject which had been managed in this way, all of your changes would be lost.
Using the tool
The tool is available on the feed rules page:
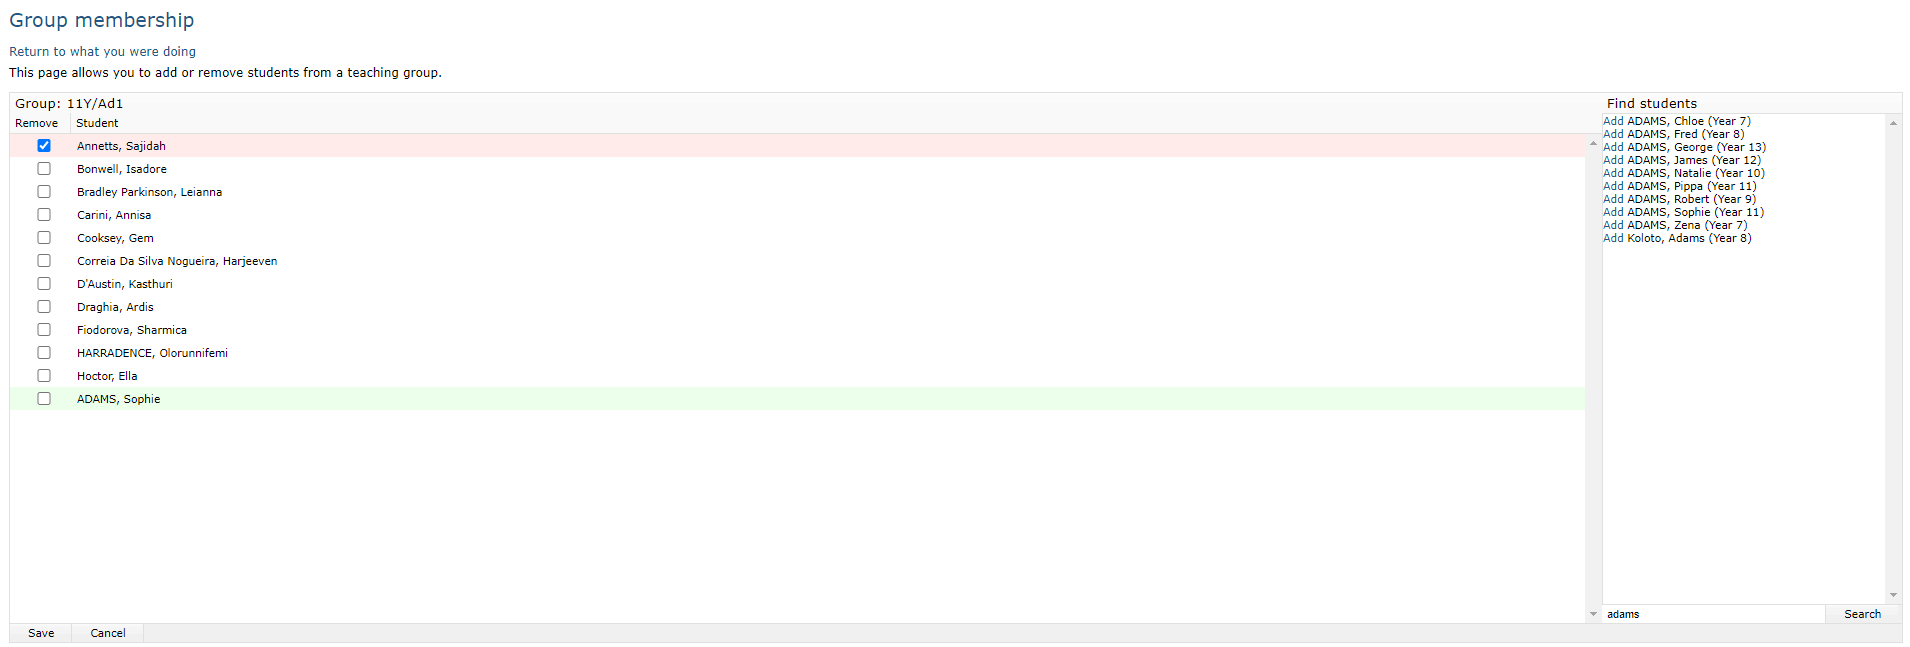
 Clicking the Manage locked subject/groups link, will open the tool. Your year groups will be listed on the left side of the tool. Clicking on a year group will display the relevant subjects, and next to those, the actions you can perform. Locked subjects display with a padlock icon to the left of them. If you select an action for a subject which is not locked, you will be warned that your change will be lost when the next feed from your MIS is processed. If you want your changes to be permanent, then you will need to return to the feed rules page and lock the subject before your next feed is processed. If you Add new subject using this tool, it will be automatically locked so that it remains visible in GO 4 Schools even after your MIS feed is processed. All changes to a subject created by the tool will need to be made manually as with any other locked subject. Before the subject is visible elsewhere in GO 4 Schools it will need to have a group created for it, and students assigned to the group. Clicking on a subject name will display the groups within that subject, and provide the same options to Rename, Move or Copy. You can also create new groups using the Add new group option. The group will only be displayed elsewhere in GO 4 Schools once students are attached to it.
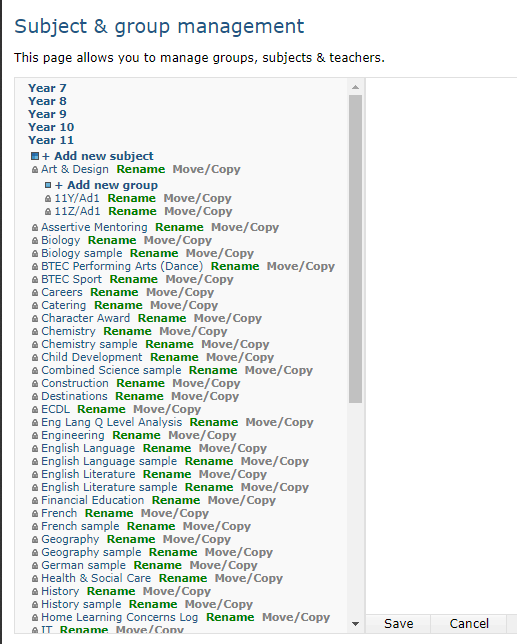 Moving a group or subject will remove it from the source location, whereas copying a group or subject will create a new version of it in your chosen destination and leave the original intact.
The copied/ moved group will contain the same set of students (and the same teacher if you make that selection), but as with feed rules the students’ assessment data will not follow them to the new destination. Within this same action window, you can decide whether the teacher should remain the same for the new group, whether you’d like to add another teacher, or replace the teacher altogether.
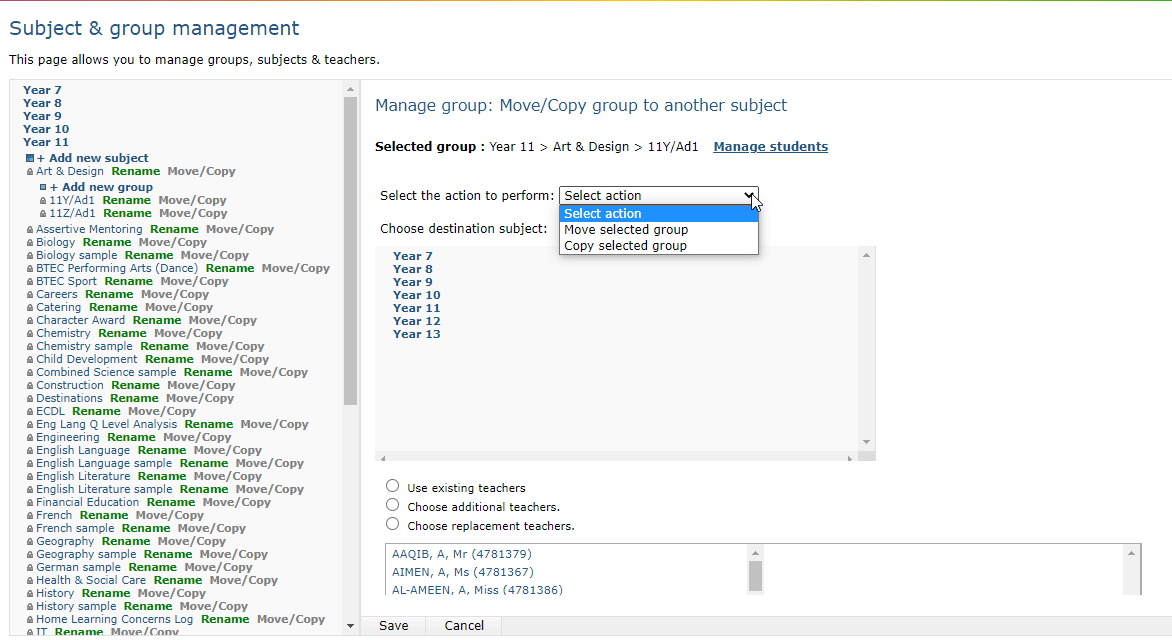
Clicking on the group name in the left window will allow you to manage the teachers for that group.
If the teacher you require is not listed, it may be that they do not exist in your MIS with a timetabled group of students. Alternatively, perhaps all of the subjects they teach are locked, which prevents the teacher being added to GO 4 Schools by your MIS feed. In either case, please raise a support ticket and provide the teacher’s details so that the support team can assist with their creation.
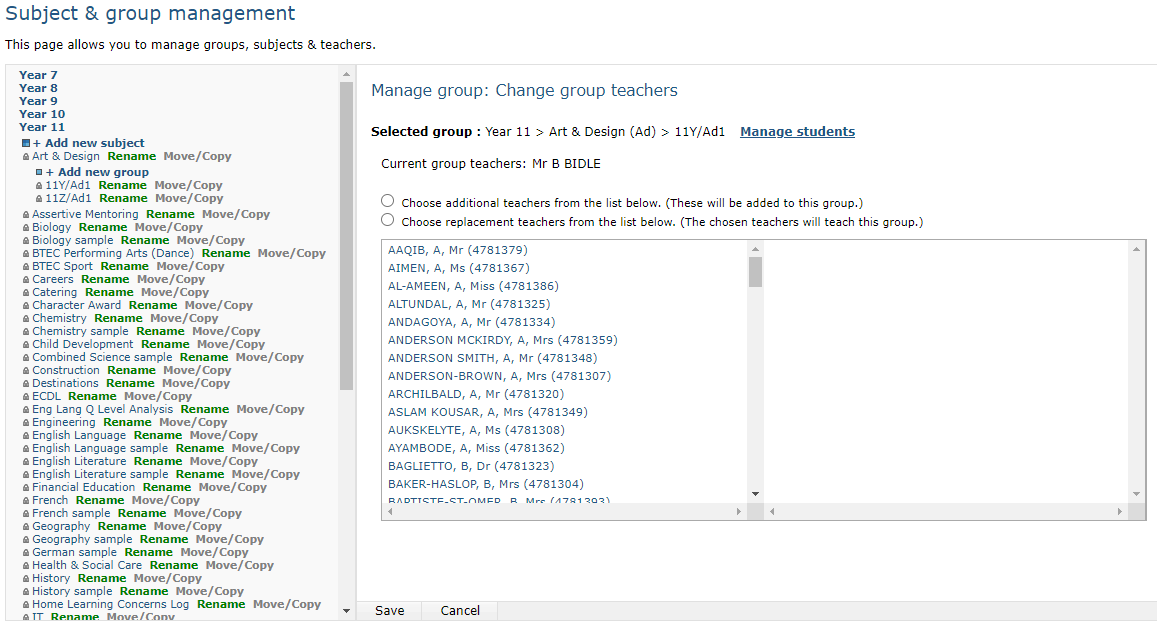 Clicking on the link to Manage students will take you to the Group membership tool, which will open with your previously selected group of students shown in the left window. To remove a student, tick the box next to their name, which will highlight their name in red. To remove multiple students, tick all that are required. Clicking Save will confirm you changes. To add a student, use the Search box in the bottom right corner to find them, then click Add next to the relevant student in the search results Doing so will add the student to the left window and highlight their name in green. As with removing, you can add multiple students, and clicking Save will confirm you choices. Once you save you'll be returned to the main menu of the Group membership tool. You can continue to make other group membership changes, or close the page to return to the Subject and group membership tool.