The Student attributes page lists the attributes currently defined in GO 4 Schools. You should click the Create a new student attribute button to define a new attribute or click on the Settings link for an existing attribute to review its definition. The Manage values link for an attribute provides an overview of the values held for the attribute. If the attribute contains data for different academic years you will need to choose the academic year of interest before you can manage the values.
Creating a new attribute
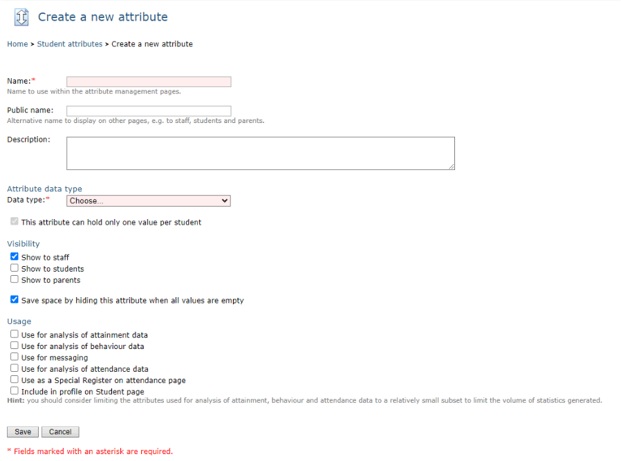
The Create a new attribute page allows you to specify the settings for a new attribute. The same page can be accessed via the Settings link for an existing attribute to adjust the settings for that attribute. You cannot change the data type for an attribute that has associated values for students. If you need to change the data type you will need to back-up your existing values to a CSV file, delete them in GO 4 Schools, change the settings, and then re-upload the values.
Managing attribute values
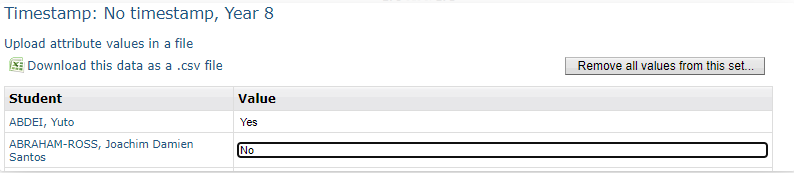
The Manage values page provides a summary of the values held for an attribute. Clicking on the values listed in the Sets of values listed by timetamp table will allow you to view and edit any existing values for that particular year group and set. When a value is selected the cell will be highlighted and the value shown in bold text. An upload link on this page allows you to upload a CSV file containing attribute values. The supported formats for the CSV files are covered in detail on the Attribute file formats page, a link to which appears on the page once the Upload attribute values in a file link has been selected.
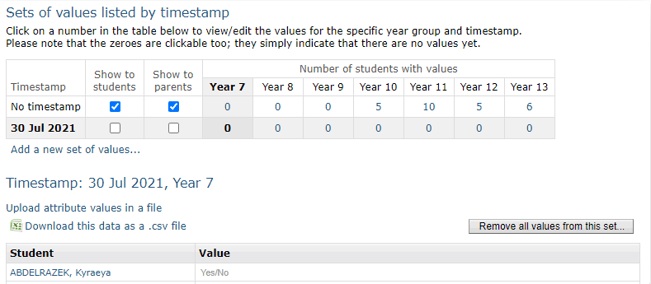
It is possible to store more than one set of values per attribute and assign a timestamp if appropriate. To do this, click on the Add a new set of values button. The timestamp allows you to specify a point in time to which the attribute values apply:
- Always
- To a specific academic year
- To a specific date
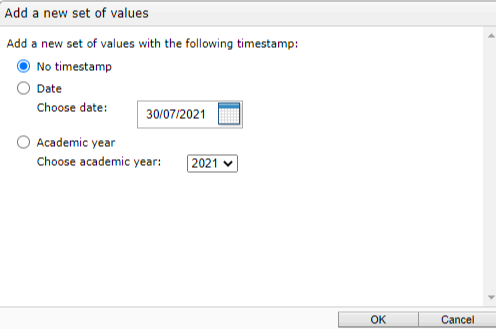
In this window you can select the timestamp you wish to apply to the new set of values:
- No timestamp - Used for a value that will not change over time, e.g. a student's feeder school.
- Date - Values apply for a specific date, e.g. the date a particular test was taken on.
- Academic year - The values apply as at the start of an academic year, e.g. a student's FSM status.
Once selected the new set of values will appear in the mid-section of the Manage values page.
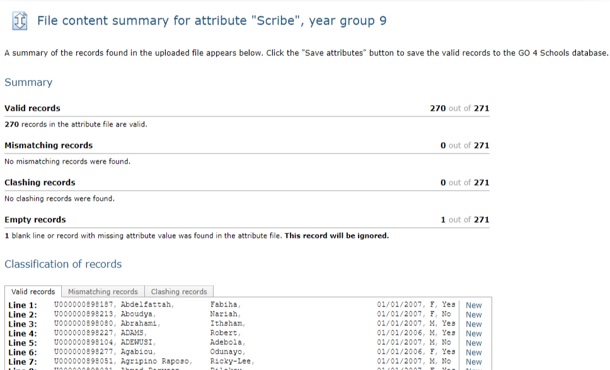
If you upload a file using the functionality on the Manage values page, you will receive feedback on the File content summary page before your values are saved to the database. The page will display the number of records that were valid, the number that were mismatches, the number that were clashing, and the number of empty records. You can review the records in each category using the tabs at the bottom of the page. If you are happy with the set of valid records you can save them to the database by clicking the Save attributes button.
You can also update values manually on the page by just entering data in the set: